Posizionamento della fotocamera
La posizione della Wired Floodlight Camera ti aiuta a ottenere la visualizzazione e le notifiche che desideri. Rubinetto ![]() nella miniatura della telecamera con proiettore cablato per accedere Live View per determinare il miglior posizionamento della telecamera.
nella miniatura della telecamera con proiettore cablato per accedere Live View per determinare il miglior posizionamento della telecamera.
Tieni presente che oggetti casuali, come automobili o foglie mosse dal vento, e persino ombre in movimento possono attivare un avviso di movimento. Nota : anche l'impatto dei rami degli alberi o eventi meteorologici estremi possono spostare le luci o la telecamera.
Le Zone attive ti consentono di mascherare determinate regioni per prevenire selettivamente gli avvisi di movimento. Questo può aiutare con eccessivi filmati o falsi avvisi. Ulteriori informazioni su come configurare le Zone attive .
Una volta installata Wired Floodlight Camera , puoi regolare l'angolazione della videocamera ed entrambe le luci LED (vedi di seguito). Ulteriori informazioni su come installare la Wired Floodlight Camera .
Per un rilevamento ottimale del movimento, posiziona la fotocamera in modo che il movimento avvenga attraverso il campo visivo della fotocamera. Ad esempio, se desideri monitorare un passaggio pedonale, posiziona la videocamera in modo da inquadrarlo lateralmente invece che frontalmente.
Posizionamento della telecamera
La Wired Floodlight Camera è dotata di due luci fissate a snodi che utilizzano l'attrito per rimanere in posizione. Puoi puntare le luci nella direzione desiderata spostandole manualmente. In totale, forniscono 2600 lumen di illuminazione a LED.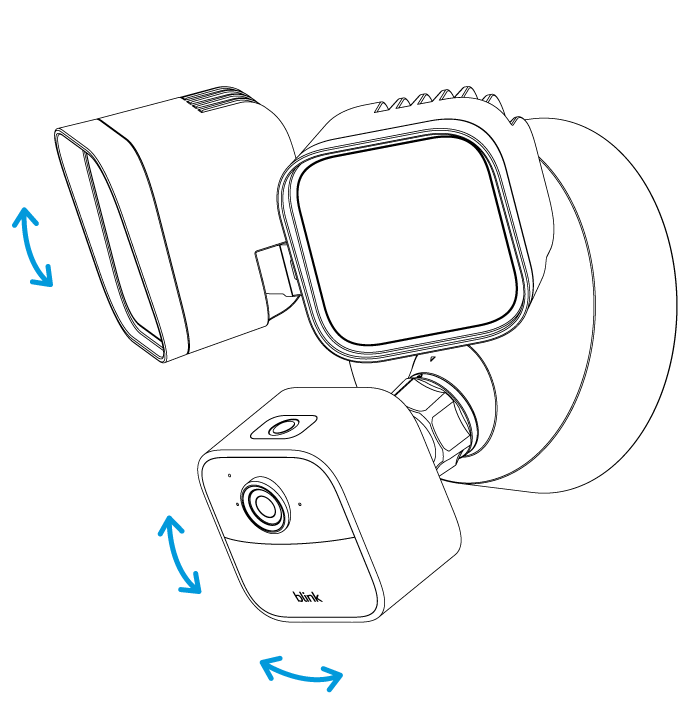
Per regolare la direzione in cui è puntata la fotocamera, tenere la fotocamera e allentare il collare a vite. Quindi, regolare l'angolazione della telecamera e serrare il collare a vite. Il campo visivo della fotocamera ha una diagonale di 143º.