The Blink Camera Stand is a Blink accessory mount providing the following features.
- Freestanding on a surface.
- Can be attached to a surface with screws.
- Can be secured magnetically.
- Pass-through design for power cord and an opening tool.
The Camera Stand is not the same as the volcano mount that is included with Blink cameras. Click to learn more about the volcano mount for Indoor (gen 2) and Outdoor cameras.
The black and white Blink Camera Stands include an "L" shaped mounting bracket in the box. Click to view the Amazon purchase page for the Blink camera stand in Black, or in White.
To use the Camera Stand with a Blink camera:
Horizontal placement (such as desktop or ceiling)
Use the "L" shaped mounting bracket to connect the camera to the stand.
You may need to connect the camera to the bracket before connecting the bracket to the stand. Notice also, that an opening allows you to access the battery compartment screw while leaving the camera back attached to the mounting bracket.
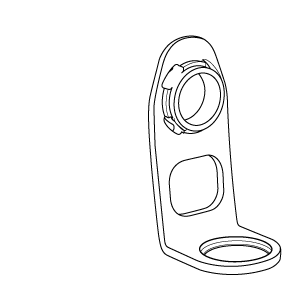

Insert the mounting bracket into the opening in the camera's back cover, and press evenly until a click is heard and/or felt.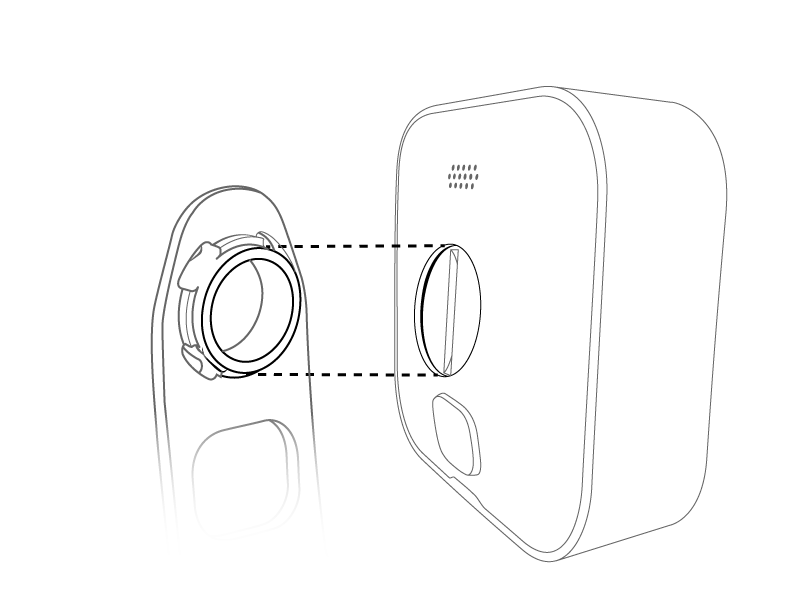
Test the connections by gently pulling (they should not come apart easily).
Vertical surface placement (such as a wall or pole)
Connect your camera directly to the stand.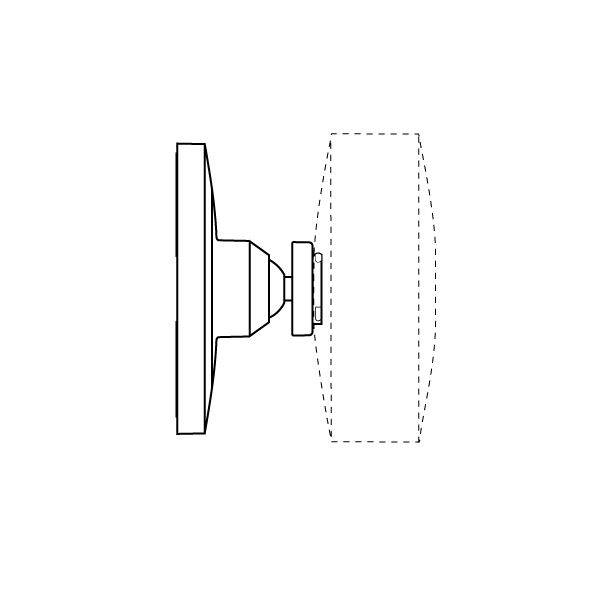
To attach the Blink Camera Stand to a surface
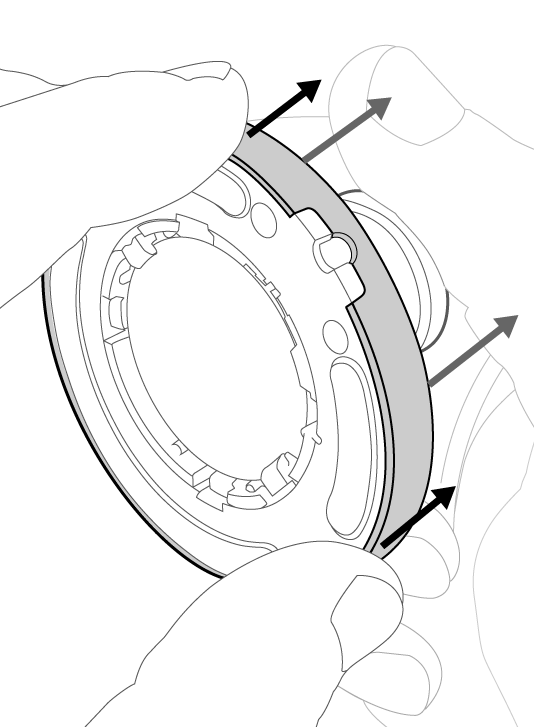
1. Access mounting holes underneath the protective ring.
1a. To remove the protective ring, grip the stand base in one hand, and press on the outer edge to loosen.
1b. Use the appropriate fastener for the material you are mounting the base to.

2. Replace the protective ring. The ring also provides security for an optional power cable.
2a. (optional) Press-fit your power cable between retaining clips in the base.
2b. Seat the ring, paying attention to the cutout. Pressing evenly around the ring's edge engages securing clips.
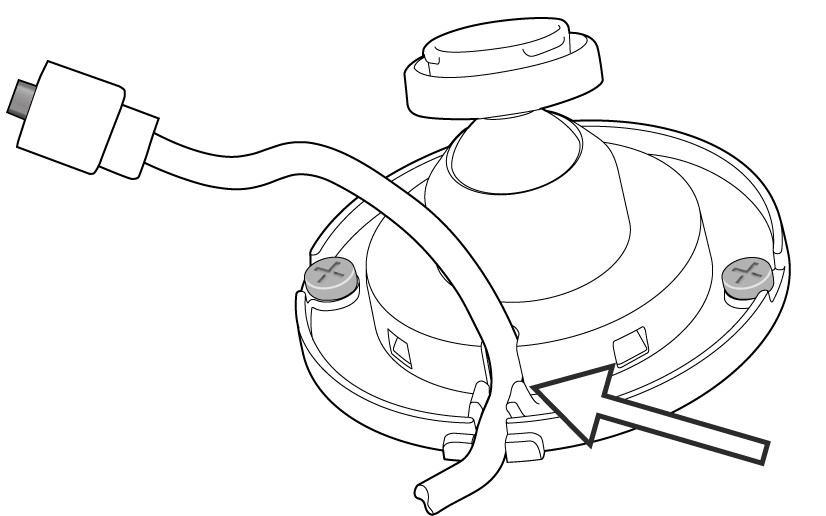
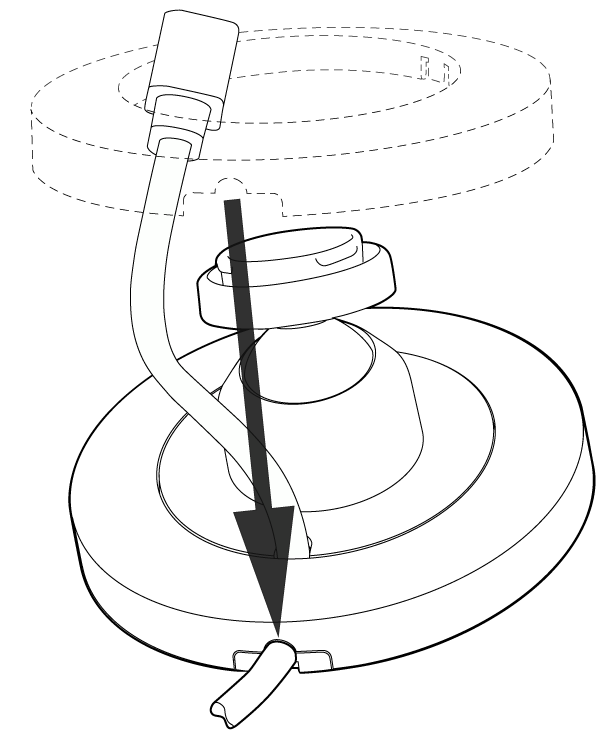
Note: If you feel resistance, or if the cable is too large for the opening, do not force it or risk damaging the cable with an implement. Find a more suitable power cable. Blink cables and accessories are made to fit together.
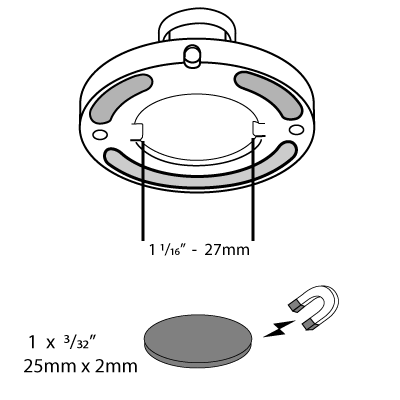
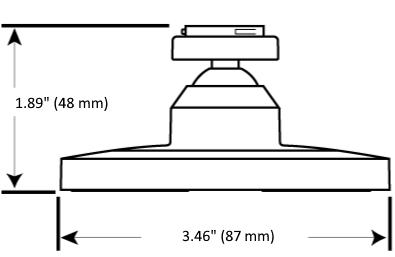
Camera Stand dimensions
For a magnetic connection
The base of the Blink Camera Stand is weighted with steel washers. A 1 inch (25 mm) diameter disc shaped magnet fits the recessed area well, but ensure that the strength of your magnet is enough to hold the entire weight of the camera and stand.