Note: This product is compatible with the Blink Outdoor (3rd Gen) Camera. For the latest model, compatible with Blink Outdoor 4 and Outdoor 2K+ cameras, visit Blink Outdoor Floodlight Mount.
The following steps explain how to install your Blink Floodlight Mount. A Blink Outdoor (3rd Gen) Camera must be set up in your Blink account before attaching the camera to the mount.
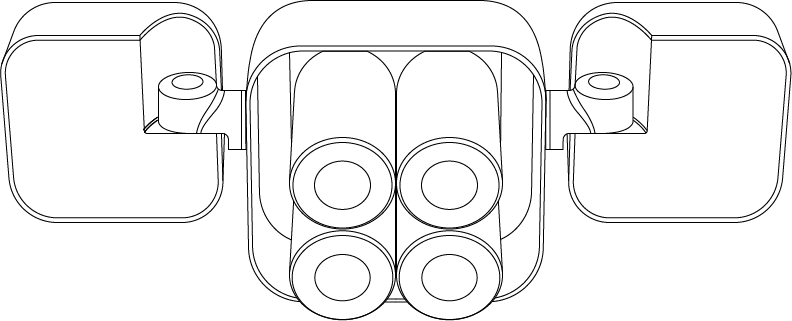
Your Blink Floodlight Mount uses 4 alkaline D-cell batteries to operate and comes preinstalled in the mount. Remove the pull tab in the battery compartment to activate power to the Floodlight Mount. To access or replace the batteries, dismount the device and twist the back cover open to access the battery compartment.
Note: Older Blink Outdoor camera models (XT and XT2) are not compatible with the Blink Floodlight Mount.
Installing the Outdoor (3rd Gen) Camera to the Floodlight Mount
1. Twist to remove the back cover of the Floodlight Mount and press the side buttons on the battery lid to open the battery compartment. Remove the battery pull tabs. If your pull tab is missing or broken, ensure both positive and negative ends of each battery are clear of any coverings and reattempt installation.
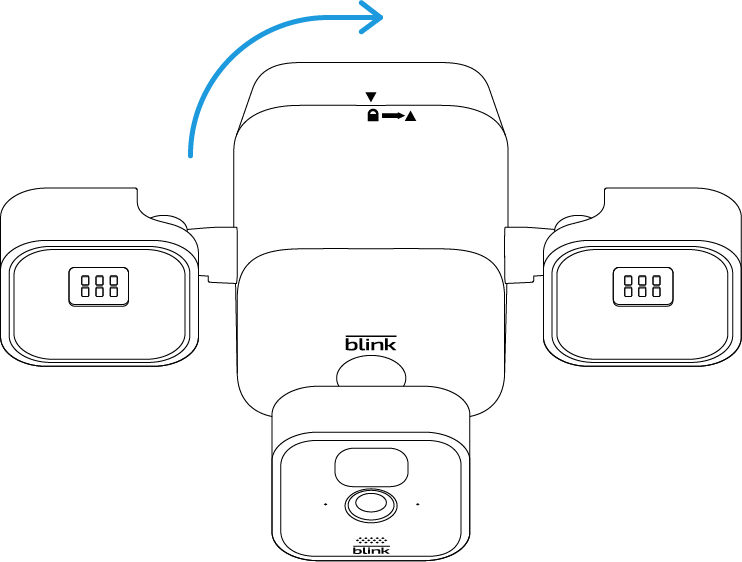
Once the batteries are installed, close the compartment and reattach the back cover.
Warning
The LED lights will flash brightly once the back cover is attached. To avoid direct light exposure, do not look directly at the lights when this occurs.
2. Remove the back cover from your Blink Outdoor (3rd Gen) Camera. Learn more about how to remove and attach the back cover on your Blink Outdoor Camera.
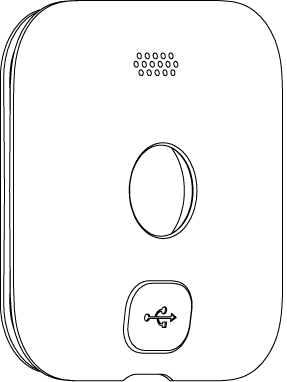
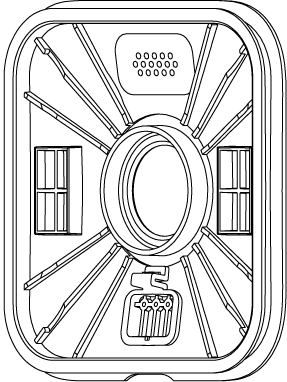
3. Detach the USB cover from the Outdoor (3rd Gen) Camera's back cover. This will ensure you have an optimal weather resistant seal between the Floodlight Mount's micro-USB cable and your camera. Once the USB cover is fully removed, reattach the back cover back on your Outdoor Camera.
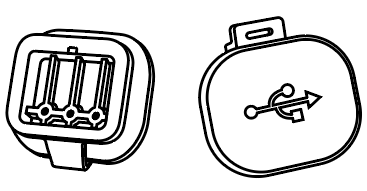 USB Cover
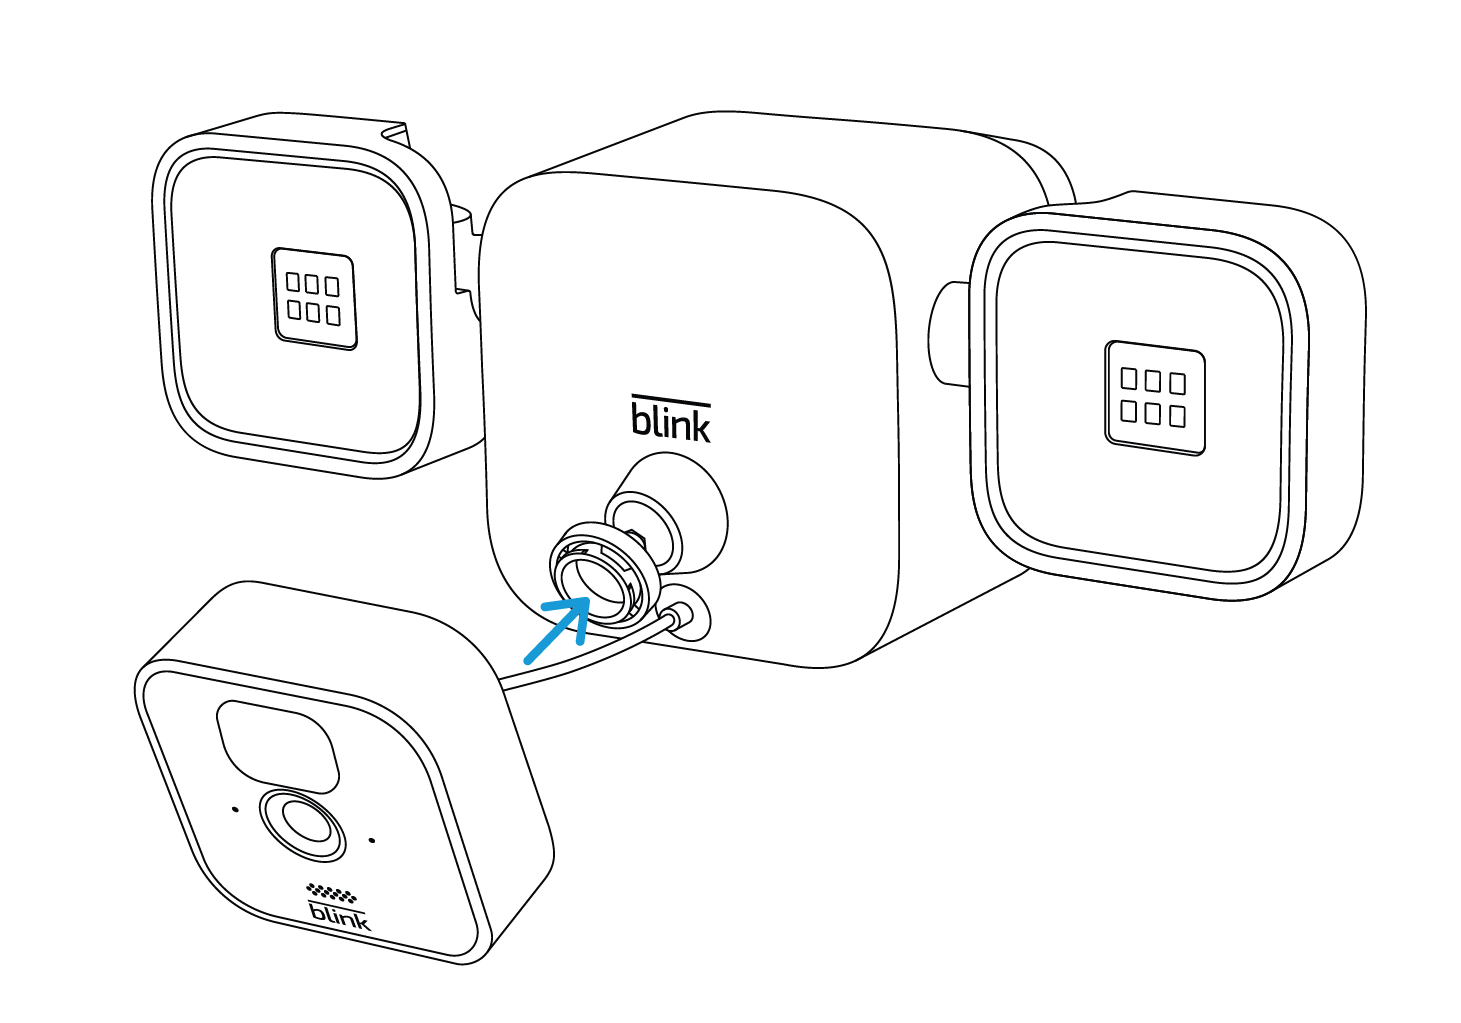
4. Firmly plug the Floodlight Mount's micro-USB cable into your Outdoor (3rd Gen) Camera. Ensure you have a tight seal on all sides.
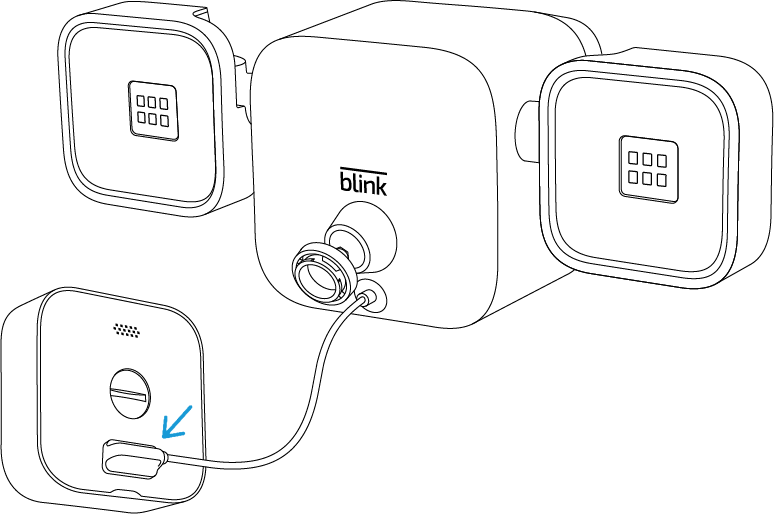
The Floodlight Mount self-configures when you plug the USB cable into your Outdoor (3rd Gen) Camera. On the Blink app, a notification appears that your Floodlight Mount is connected, as well as added to your camera.
Tap OK to continue.
5. Line up hole on the back of the camera to the swivel neck and snap it onto the mount. You have now successfully installed your Outdoor (3rd Gen) Camera onto the Floodlight Mount.
Using the included mounting kit
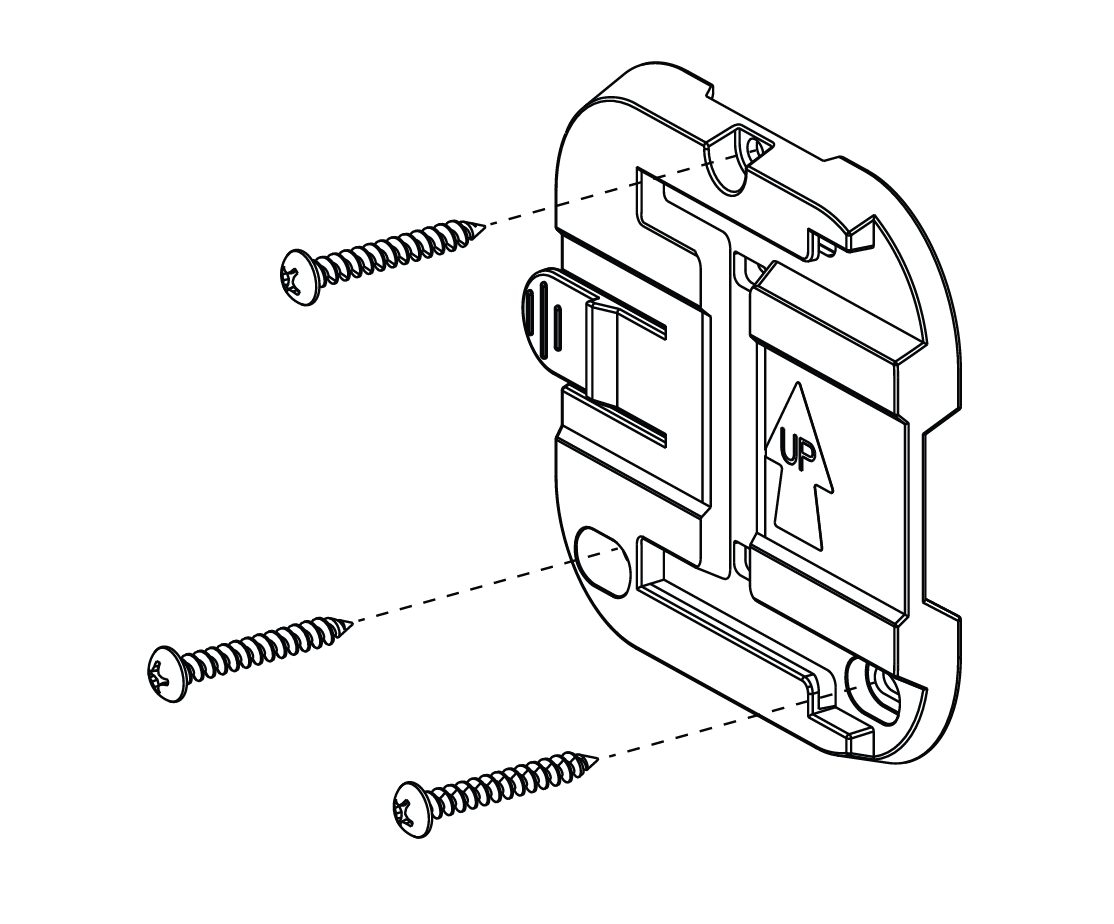
Once you've attached your Outdoor (3rd Gen) Camera to the Floodlight Mount, you are ready to install it anywhere around your home using the included mounting kit. Your box contains:
- A Mounting Bracket
- Three, 1 1/2" Phillips head screws with wall anchors
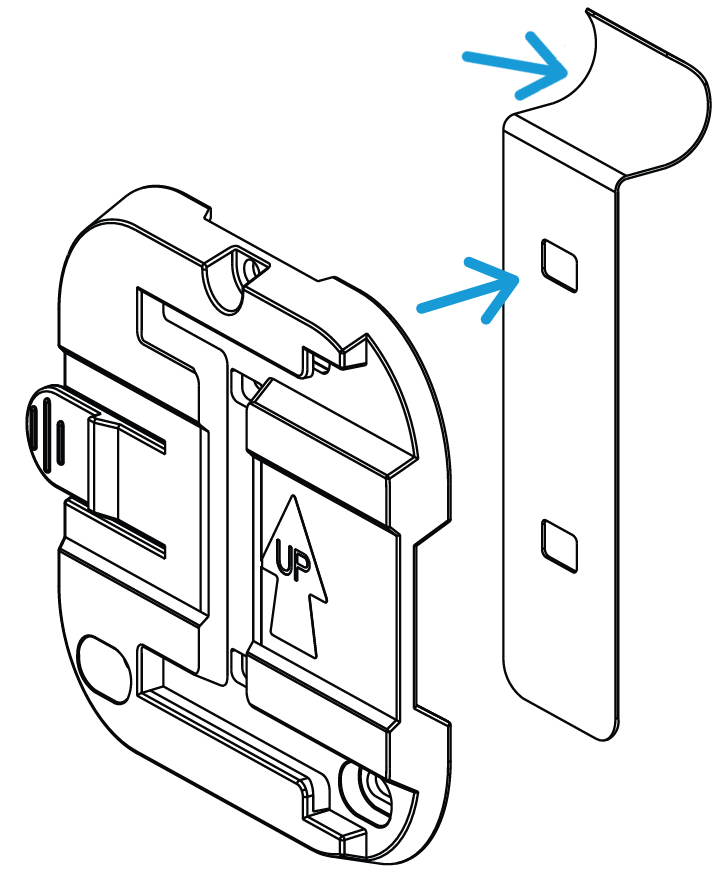
- A no-drill attachment strip for installing the bracket on vinyl siding
- The curved top part of this strip fits under the bottom of the siding panel.
|
|
Wall Installation |
No-Drill Installation for Vinyl Siding |
The Mounting Bracket is designed for mounting on homes, trees, or fences. Once the bracket is mounted in a desired location, line up the Floodlight Mount with the right side of the bracket and slide it left over the bracket until it clicks into place.
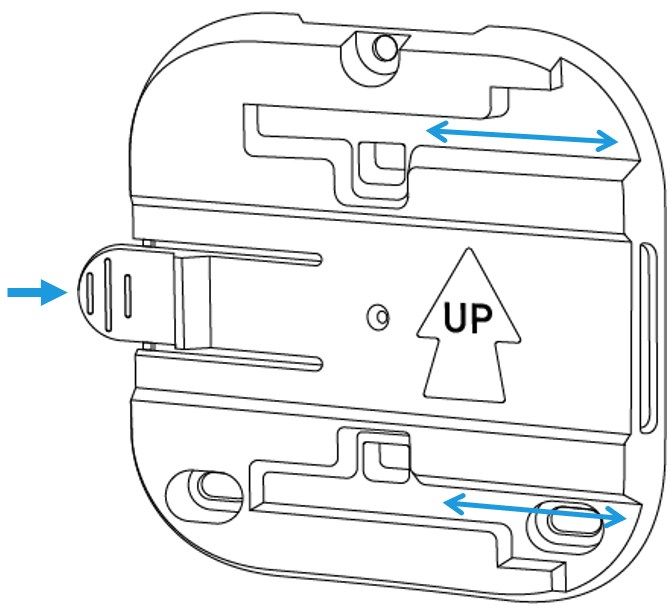
To remove the Floodlight Mount from the mounting bracket, push the tab on the left side of the bracket away from you and slide the Floodlight Mount right.
Adjusting the Floodlight Mount after it's been installed
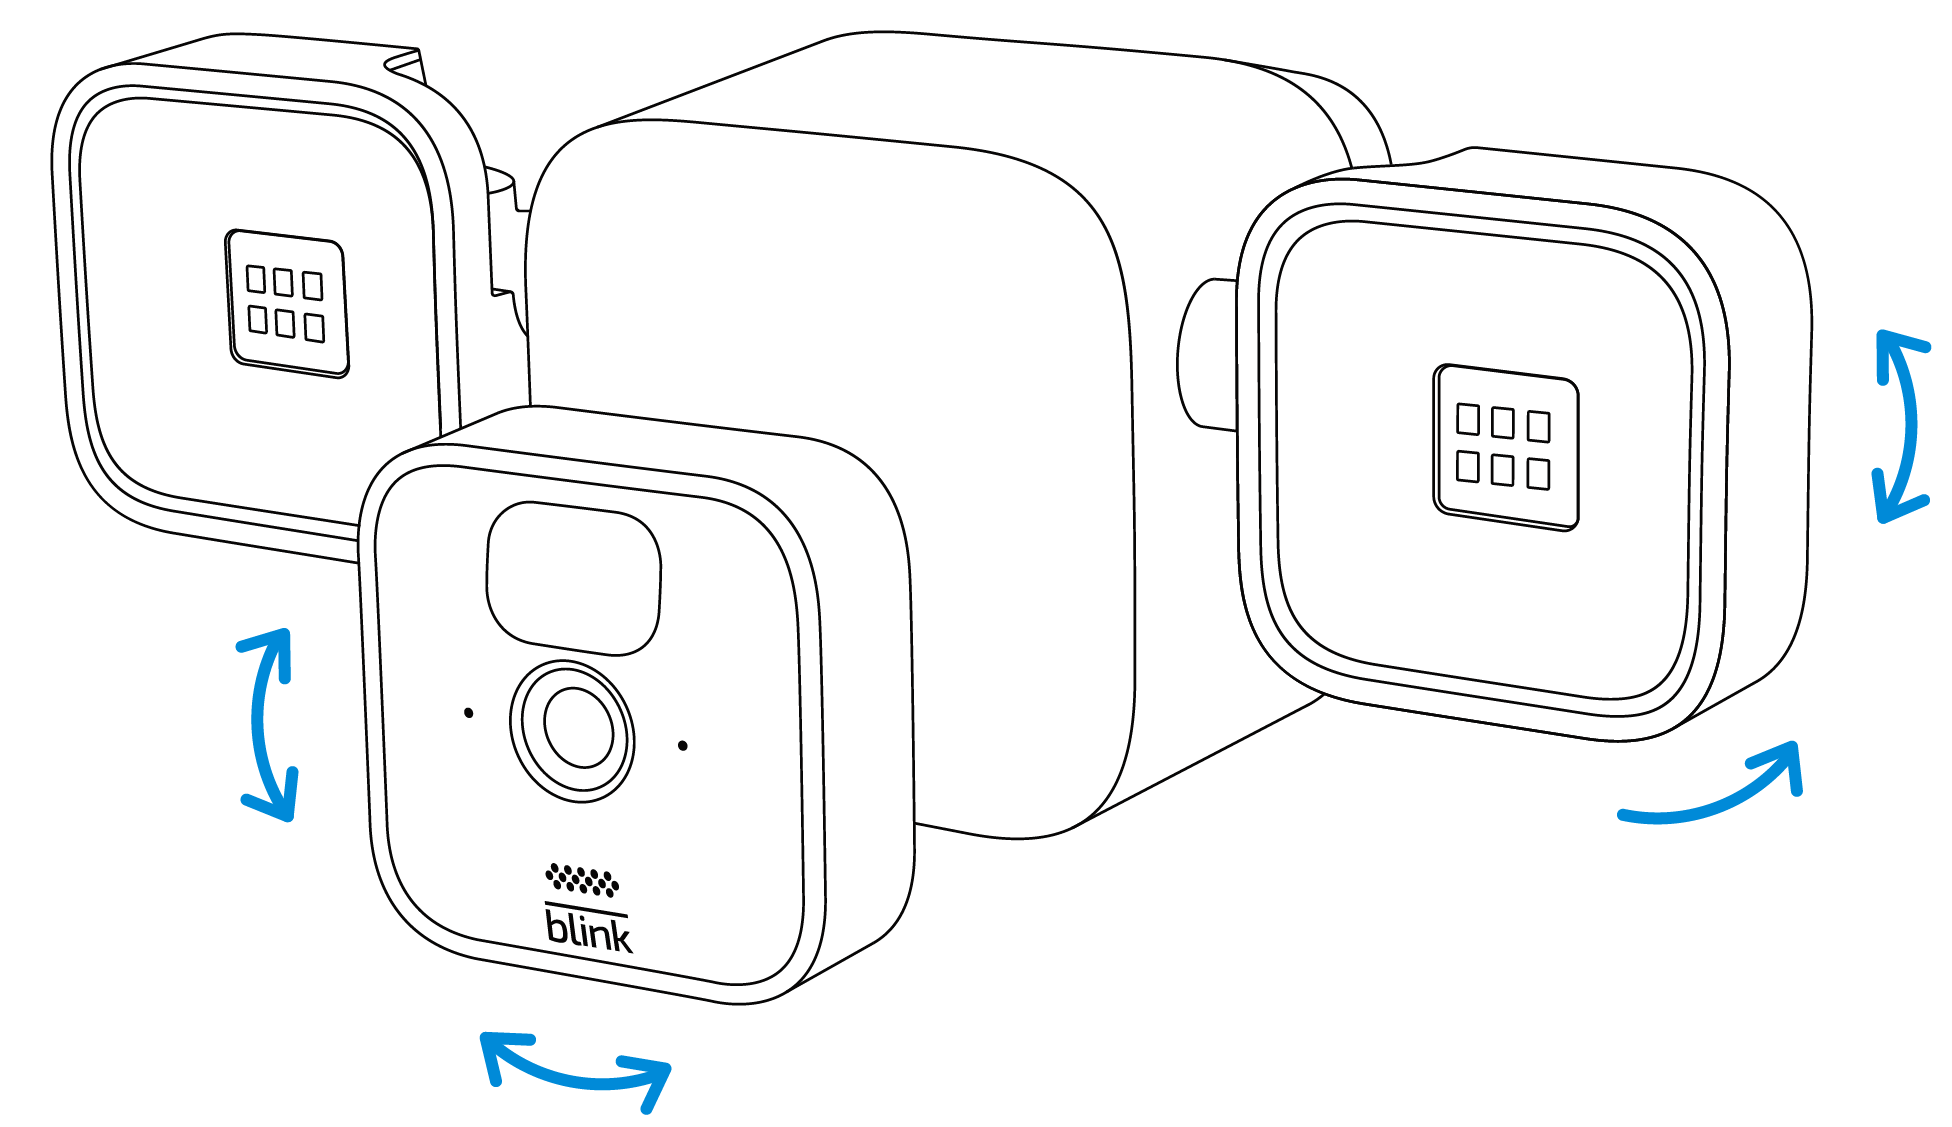
Use Live View in conjunction with physically adjusting the Floodlight Mount to optimize the viewing angle of the camera.
The light panels on the Floodlight Mount can be rotated up or down, as well as away from the Blink Outdoor (3rd Gen) camera, to provide maximum light coverage. In addition, the Outdoor Camera can be swiveled on the mount for optimal viewing.
Deleting the Blink Floodlight Mount from your Blink system
Follow these instructions if you want to delete your Blink Floodlight Mount from the Blink app and continue to use the Outdoor (3rd Gen) camera attached to it.
- Disconnect the Floodlight's micro-USB cable from your camera.
- Remove the camera from the Floodlight Mount by pulling it directly off the swivel neck.
- Tap More (...) at the bottom right of the device's thumbnail image to access Device Settings.
- Select Floodlight Settings and the screen will display "Floodlight is disconnected".
- Tap the Delete Device option at the bottom.
- A popup will appear asking "Delete This Device?" Tap Delete Device to confirm the removal of the Floodlight Mount from your system.
- Once it's been deleted, the Floodlight Settings section is removed from your camera's Device Settings; however, your Outdoor (3rd Gen) Camera will remain operational in your system.
